· Asen Nikolov · Umbraco
Setting Up Umbraco On-Prem with a Next.js Frontend Hosted on Vercel
A step-by-step guide to enabling Umbraco's Content Delivery API, connecting it to a Next.js App Router frontend, and deploying on Vercel with webhook-based content revalidation.
Setting Up Umbraco On-Prem with a Next.js Frontend Hosted on Vercel
Umbraco is a mature, editor-friendly .NET CMS, but plenty of teams want it to stay exactly where it is - on a company server or in a private data center - while the public-facing website runs on modern, edge-deployed infrastructure like Vercel. Umbraco's built-in Content Delivery API makes this split possible without third-party middleware: Umbraco stays the system of record and editing experience, and Next.js becomes a fast, statically-optimized frontend that pulls JSON from it. This guide walks through enabling the Delivery API on an on-prem Umbraco instance, consuming it from a Next.js App Router frontend, and deploying that frontend to Vercel with webhook-based content revalidation.
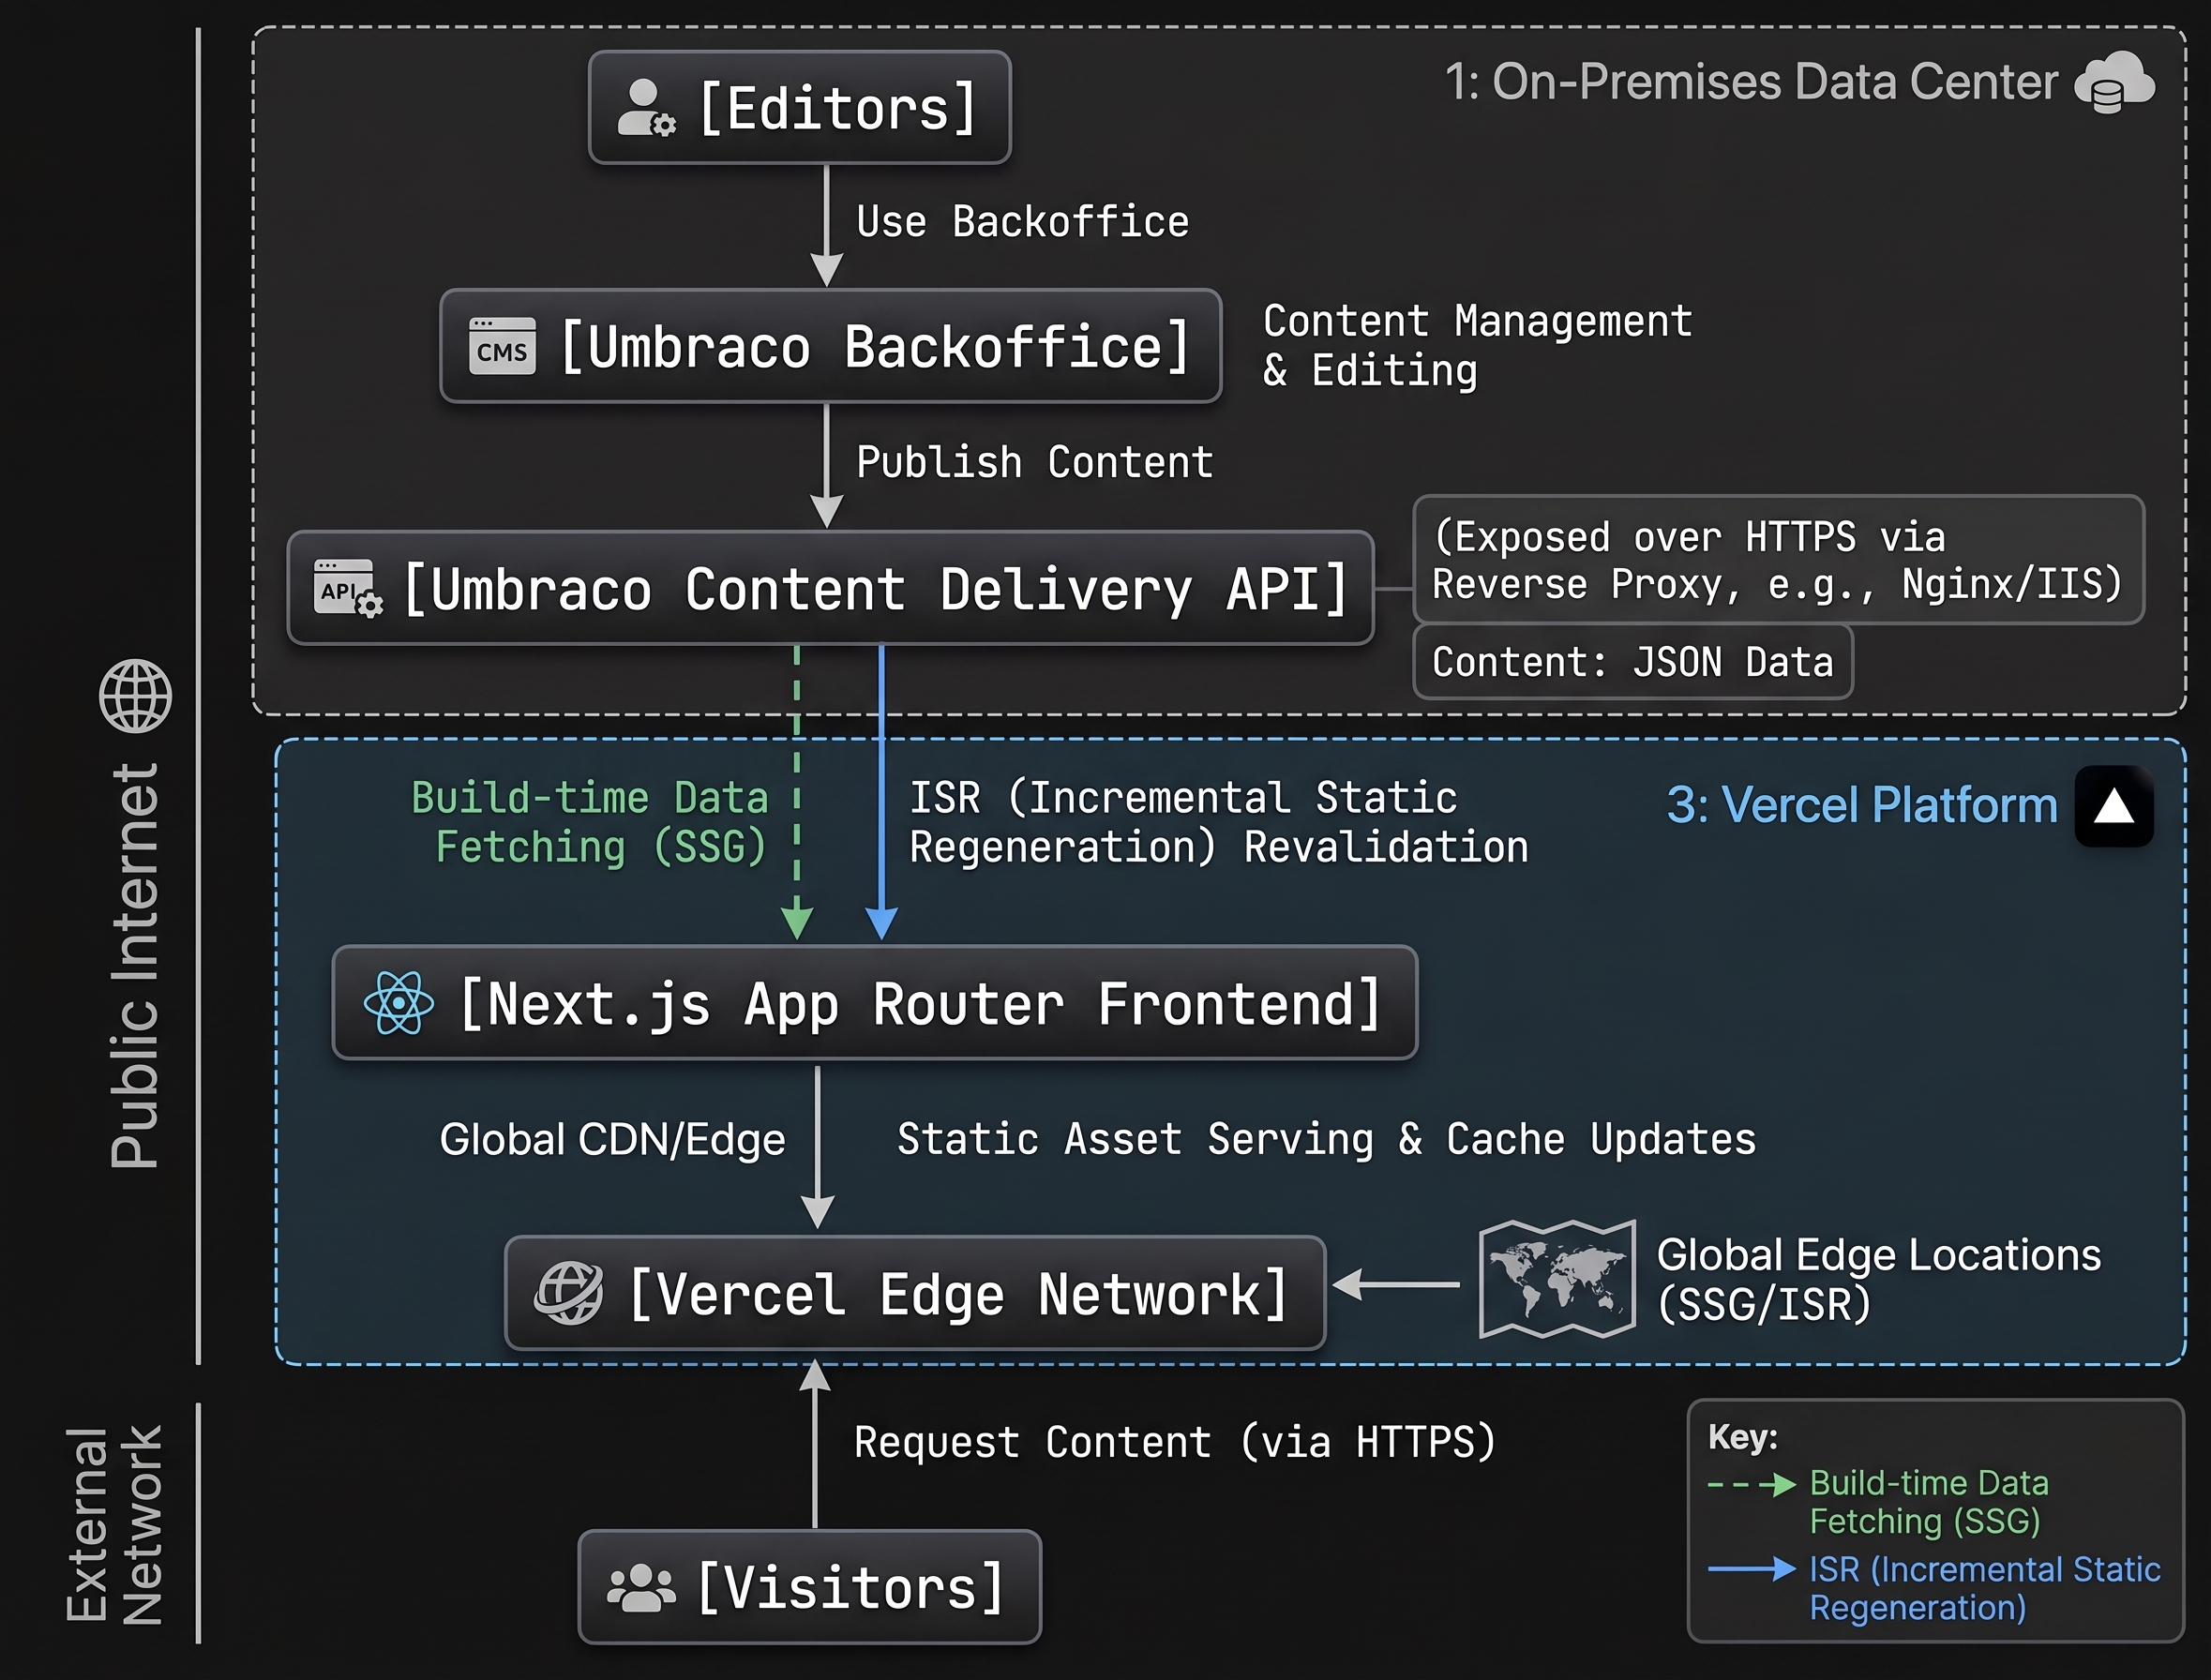
Architecture Overview
Umbraco never renders HTML for the public site in this model - it just serves structured JSON. Next.js fetches that JSON at build time and on-demand, renders pages (statically where possible), and Vercel handles CDN distribution, caching, and scaling.
Prerequisites
An on-prem (or self-hosted) Umbraco instance, version 12 or later - this guide targets Umbraco 13/17 LTS, where the Delivery API is a first-class, documented feature.
.NET SDK matching your Umbraco version (Umbraco 13 → .NET 8, Umbraco 17 → .NET 9).
Node.js 18+ and a Next.js 14+ project using the App Router.
A way to expose the on-prem server to the internet over HTTPS (reverse proxy, firewall rule, or tunnel) - Vercel's build and edge servers need to reach it.
A Vercel account with the project connected to your Git repo.
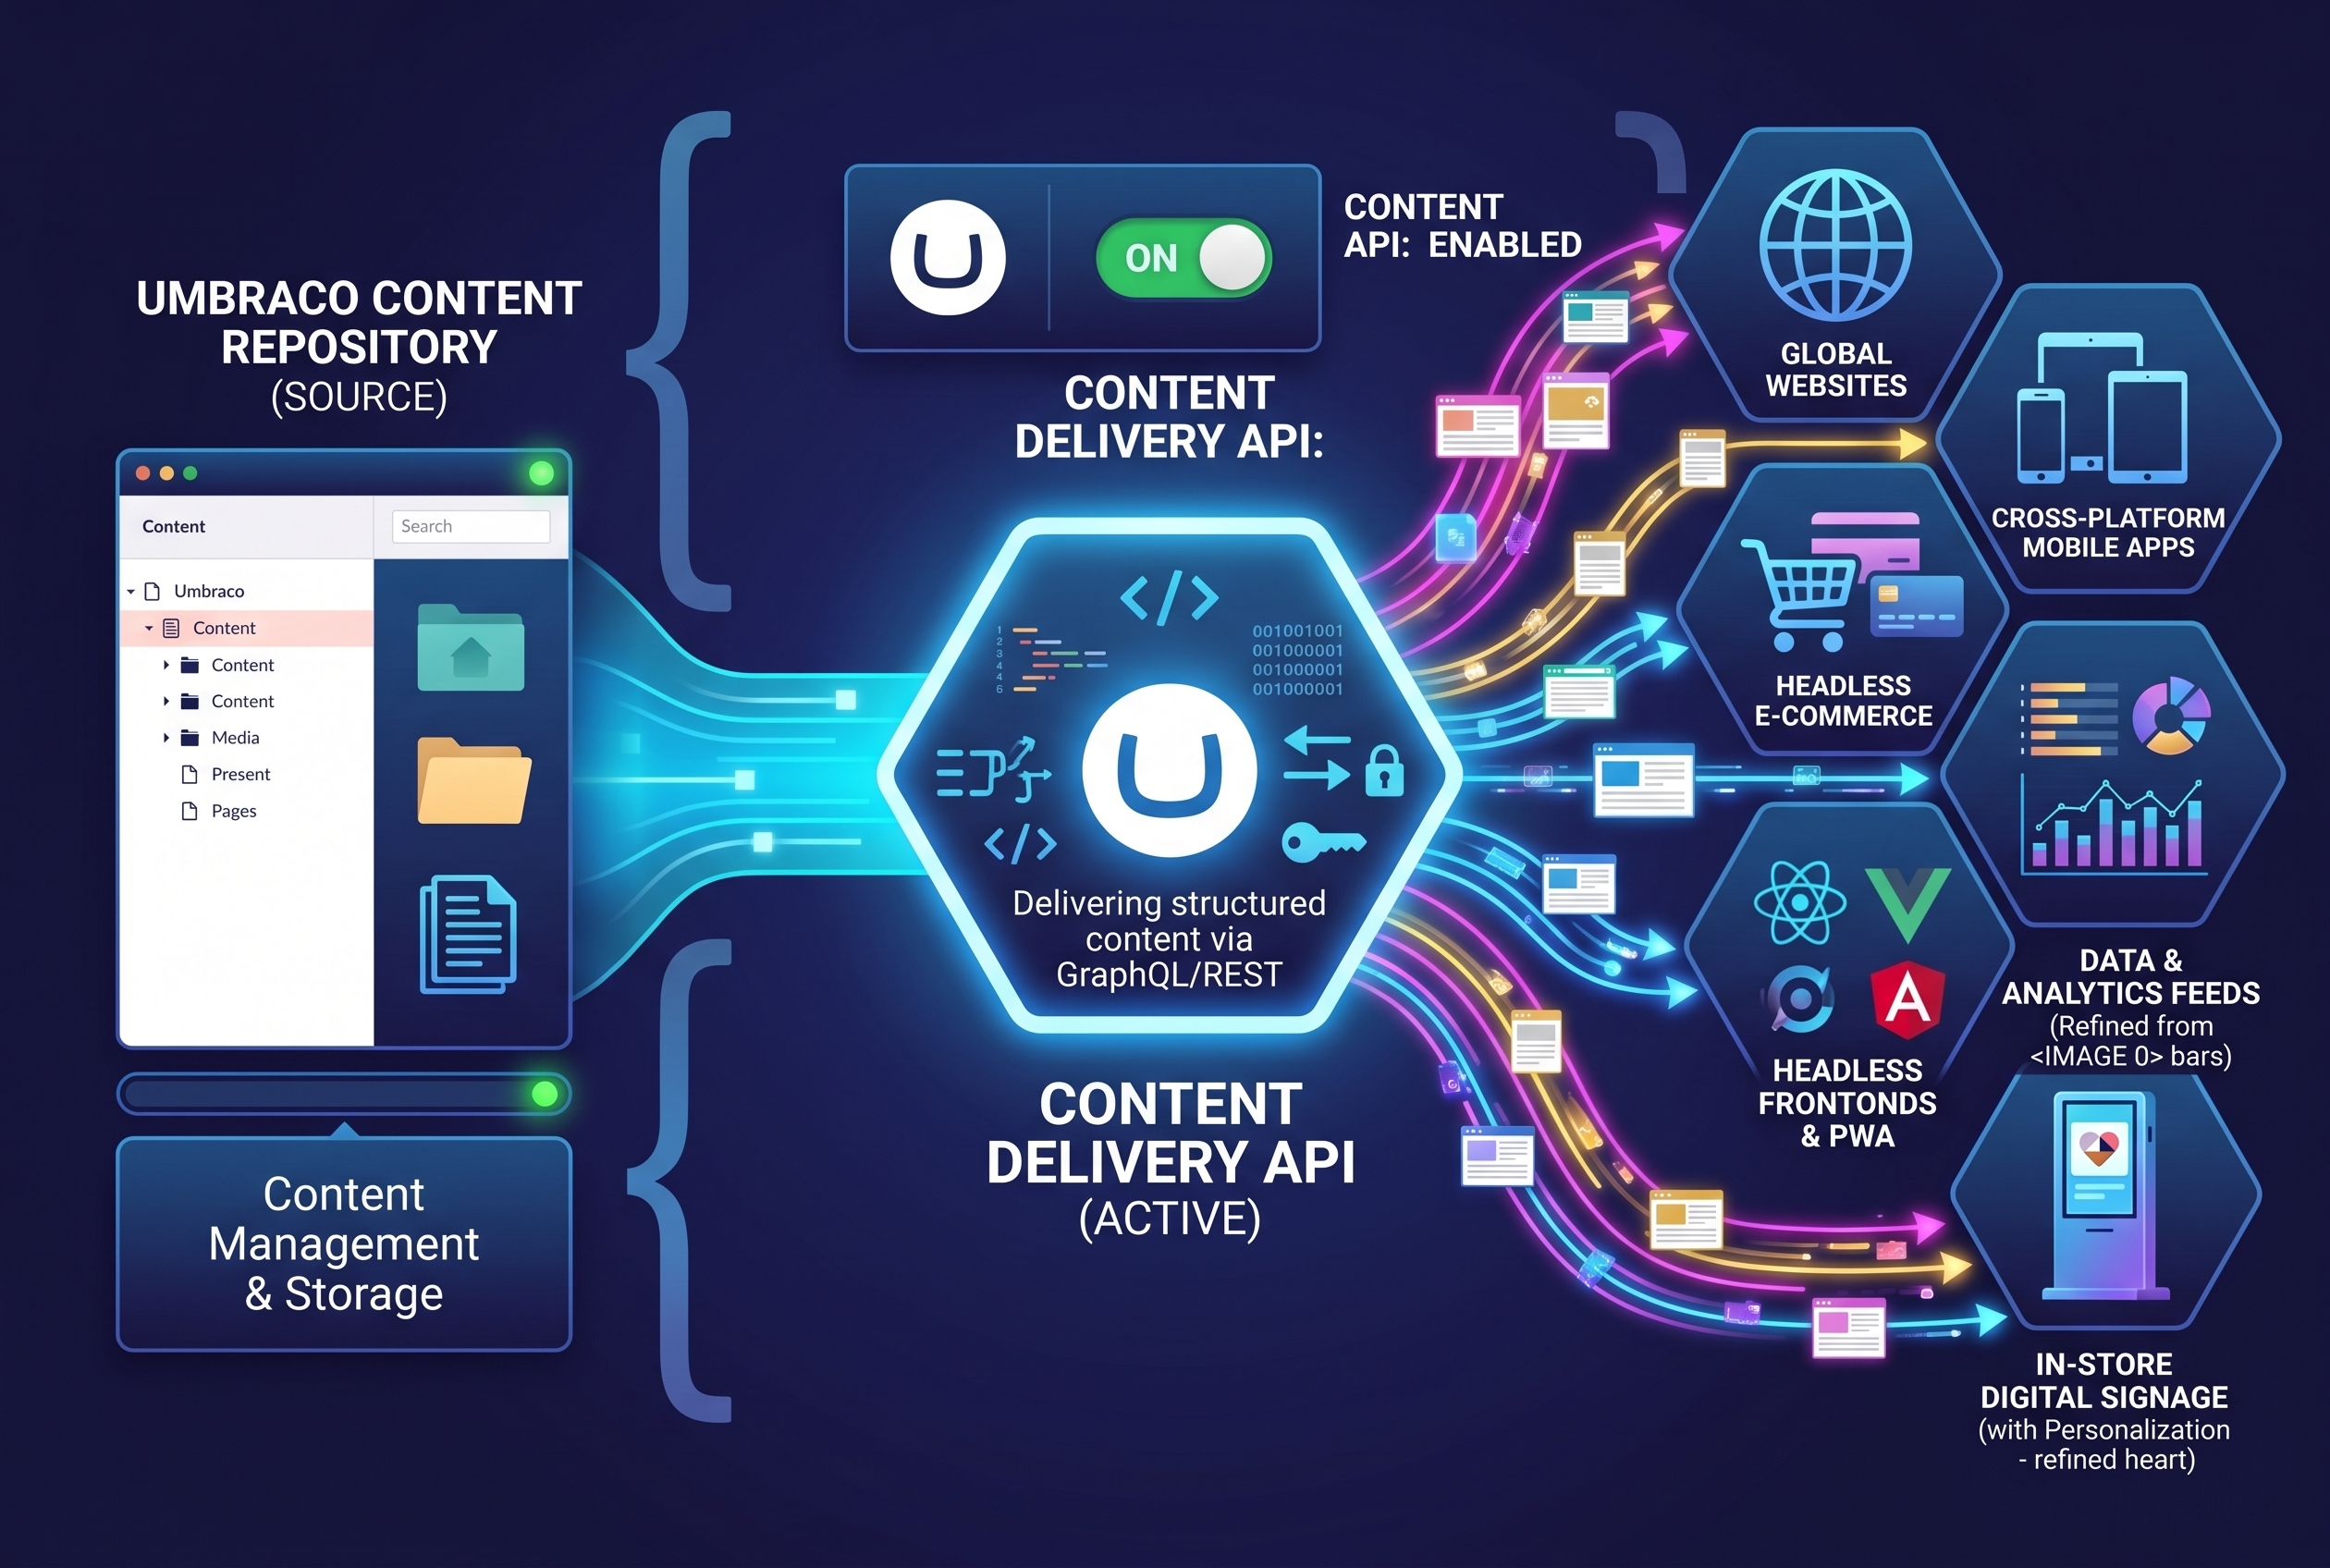
Part 1: Enable the Content Delivery API in Umbraco
1. Turn on the Delivery API
If you're scaffolding a new project, you can enable it in one step:
dotnet new umbraco -n MyProject -daFor an existing on-prem instance, enable it manually in appsettings.json:
{
  "Umbraco": {
    "CMS": {
      "DeliveryApi": {
        "Enabled": true,
        "PublicAccess": false,
        "ApiKey": "a-long-random-secret-here",
        "DisallowedContentTypeAliases": [],
        "AllowedContentTypeAliases": [],
        "RichTextOutputAsJson": true
      }
    }
  }
}
Then register it in Program.cs:
builder.CreateUmbracoBuilder()
    .AddBackOffice()
    .AddWebsite()
    .AddDeliveryApi()
    .AddComposers()
    .Build();
A few notes on the config keys:
PublicAccess: false plus an ApiKey is the recommended setup for an on-prem instance you're exposing to the public internet - it means published content still requires the Api-key header, which keeps your endpoint from being an open, unauthenticated firehose.
RichTextOutputAsJson: true returns rich text as structured JSON instead of raw HTML, which is much easier to render safely in React and routes internal links correctly.
Store the API key as a secret (environment variable or secrets manager), not committed to source control
2. Rebuild the Delivery API index
After enabling the API, rebuild the DeliveryApiContextIndex so it can serve content:
In the Umbraco backoffice, go to Settings -> Examine Management.
Open DeliveryApiContentIndex.
Click Rebuild index.
3. Expose the API securely
Since this is on-prem, the Next.js build (and Vercel's servers) need to reach the API over the public internet. In practice:
Put Umbraco behind a reverse proxy (IIS with URL Rewrite, or Nginx) terminating HTTPS with a real certificate (Let's Encrypt or your CA).
Restrict the exposed surface to /umbraco/delivery/api/* where possible, or at minimum keep the Umbraco backoffice (/umbraco) locked down separately (IP allow-list, VPN, or Umbraco's own backoffice authentication) from the public Delivery API.
Enable CORS for your Vercel domain(s) if you plan to call the API from the browser (client-side fetches) rather than only from the Next.js server. Configure it in appsettings.json under Umbraco:CMS:WebRouting / Cors, or handle it in your reverse proxy.
If your infrastructure team is uncomfortable opening a public port, a tunnel (e.g., Cloudflare Tunnel) that only routes traffic to the Delivery API path is a good middle ground.
4. Quick test:
curl -H "Api-Key: a-long-random-secret-here" \ https://cms.yourdomain.com/umbraco/delivery/api/v2/content?fetch=children:/&take=10
You should get back paged JSON of your published content nodes.
Part 2: Consume the API from Next.js (App Router)
1. Project setup
npx create-next-app@latest my-site --app --typescript
cd my-site
Add your Umbraco endpoint and key as environment variables in .env.local:
UMBRACO_API_URL=https://cms.yourdomain.com/umbraco/delivery/api/v2
UMBRACO_API_KEY=a-long-random-secret-here
2. A small fetch client
const BASE_URL = process.env.UMBRACO_API_URL!;
const API_KEY = process.env.UMBRACO_API_KEY!;

type FetchOptions = {
  revalidate?: number | false;
  tags?: string[];
};

export async function umbracoFetch<T>(
  path: string,
  { revalidate = 3600, tags = [] }: FetchOptions = {}
): Promise<T> {
  const res = await fetch(`${BASE_URL}${path}`, {
    headers: { "Api-Key": API_KEY },
    next: { revalidate, tags },
  });

  if (!res.ok) {
    throw new Error(`Umbraco Delivery API error ${res.status}: ${path}`);
  }

  return res.json();
}
3. Fetching a page by route
Umbraco's Delivery API resolves content by URL path, which maps neatly onto a Next.js catch-all route.
import { umbracoFetch } from "@/lib/umbraco";
import { notFound } from "next/navigation";

type ContentItem = {
  name: string;
  contentType: string;
  properties: Record<string, unknown>;
};

export default async function Page({
  params,
}: {
  params: { slug?: string[] };
}) {
  const path = `/${(params.slug ?? []).join("/")}`;

  let content: ContentItem;
  try {
    content = await umbracoFetch<ContentItem>(
      `/content/item${path}`,
      { tags: [`content:${path}`] }
    );
  } catch {
    notFound();
  }

  return (
    <article>
      <h1>{content.name}</h1>
    </article>
  );
}

export const dynamicParams = true;
4. Generating static paths at build time
To pre-render your known pages (and get the performance benefits of static generation), fetch the full content tree and generate params:
export async function generateStaticParams() {
  const data = await umbracoFetch<{ items: { route: { path: string } }[] }>(
    `/content?fetch=descendants:/&take=100`,
    { revalidate: false }
  );

  return data.items.map((item) => ({
    slug: item.route.path.split("/").filter(Boolean),
  }));
}
5. Images and media
Umbraco media items come back with their own URLs from the Media Delivery API. Point Next.js's Image Optimization at your Umbraco media domain in next.config.js:
// next.config.js
module.exports = {
  images: {
    remotePatterns: [
      { protocol: "https", hostname: "cms.yourdomain.com" },
    ],
  },
};
Part 3: Deploy to Vercel
1. Connect the repo and set environment variables
In the Vercel dashboard: Project → Settings → Environment Variables, add UMBRACO_API_URL and UMBRACO_API_KEY for Production, Preview, and (optionally) Development. Keep the API key server-side only - don't prefix it with NEXT_PUBLIC_ , since it should never reach the browser.
2. Deploy
vercel --prodOr just push to your connected branch - Vercel builds and deploys automatically. During the build, generateStaticParams and any server components will call out to your on-prem Umbraco instance, so make sure the on-prem API is reachable from Vercel's build infrastructure (no VPN-only access without a tunnel/allow-list for Vercel's IP ranges).
3. Keep content fresh: on-demand revalidation via webhook
Static generation is great for performance, but editors expect changes to go live promptly. Umbraco has built-in Webhooks (Settings → Webhooks in the backoffice) that can fire on events like Content Published . Use one to hit a Next.js revalidation route instead of waiting for a full rebuild:
import { revalidateTag } from "next/cache";
import { NextRequest, NextResponse } from "next/server";

export async function POST(req: NextRequest) {
  const secret = req.nextUrl.searchParams.get("secret");
  if (secret !== process.env.REVALIDATE_SECRET) {
    return NextResponse.json({ message: "Invalid secret" }, { status: 401 });
  }

  const body = await req.json();
  const path: string | undefined = body?.route ?? body?.path;

  if (path) {
    revalidateTag(`content:${path}`);
  }

  return NextResponse.json({ revalidated: true, now: Date.now() });
}
In the Umbraco backoffice, create a webhook for the Content Published event pointing to:
https://your-site.vercel.app/api/revalidate?secret=YOUR_REVALIDATE_SECRETThis gives you the performance of static generation with near-real-time updates when editors publish - no full redeploy required.
4. Custom domain and HTTPS
Attach your production domain under Project → Settings → Domains in Vercel; it handles TLS certificates automatically. Point your Umbraco admin-facing DNS (if separate from the public site) at your on-prem host or reverse proxy as usual.
Security Checklist
Require the Delivery API key for all requests (PublicAccess: false), even for published content, unless you have a specific reason to leave it open.
Never expose the Umbraco backoffice (/umbraco) on the same public hostname as the Delivery API without additional access controls (VPN, IP allow-list, or a separate subdomain with its own protections).
Store UMBRACO_API_KEY and REVALIDATE_SECRET as Vercel environment variables, never in client-side code.
Use DisallowedContentTypeAliases to make sure internal-only content types are never exposed through the API.
Put the on-prem endpoint behind a WAF or rate limiter if it's internet-facing - it's now a public API surface, not just an internal admin tool.
Common Pitfalls
Forgetting to rebuild the Delivery API index after enabling it - the API will return empty results until DeliveryApiContextIndex is rebuilt.
CORS errors when calling the API directly from the browser instead of from Next.js server components - either fetch server-side (recommended) or configure CORS explicitly for your Vercel domain.
Vercel builds failing intermittently because the on-prem server is behind a firewall that doesn't allow Vercel's build IPs - use a tunnel or allow-list Vercel's published IP ranges.
Deeply nested content models hitting .NET's JSON depth limit - raise MaxDepth for the Delivery API's JSON options if you see serialization errors in the Umbraco log viewer.
Wrapping Up
Keeping Umbraco on-prem doesn't mean giving up a modern frontend stack. The Content Delivery API gives you a clean, JSON-based contract between the CMS and the frontend, Next.js's App Router handles static generation and on-demand rendering, and Vercel's webhook-driven revalidation keeps published changes flowing through in near real time - all without exposing Umbraco's rendering pipeline or backoffice to the public internet.
We build headless Umbraco on .NET like this for clients across Europe — including this site. How we use the platform, and where the version deadlines fall: Umbraco.